
Compre el kit de educación en casa para la eclosión de pollos: un plan completo de 4 a 6 semanas, presupuestos y resultados de calidad para el aula.
Si estás listo para incorporar una experiencia STEM en vivo a tu educación en casa, un kit curricular para la eclosión de pollitos te ofrece biología, ingeniería, matemáticas, escritura y desarrollo personal en un proyecto memorable. Esta guía te ofrece un alcance y una secuencia de 4 a 6 semanas, objetivos de aprendizaje alineados, listas de verificación de materiales, adaptaciones por edad, solución de problemas y consejos de compra para todos los presupuestos. Piensa en ello como elegir un traje de lujo: el ajuste, el acabado y la atención al detalle son importantes. Nos centraremos en materiales de calidad y herramientas confiables para que la primera eclosión de tu familia sea segura, humana y exitosa.
Conclusiones clave / Resumen
- Duración del proyecto: 4 a 6 semanas (2 semanas de preparación + 21 días de incubación + 1 semana de lanzamiento del cuidado de la criadora).
- Rangos de presupuesto: $75–$125 bricolaje básico, $150–$225 nivel medio, Prima de $250 a $300+ , dependiendo de la capacidad de la incubadora y la calidad de la criadora.
- Qué comprar primero: Incubadora confiable con control de temperatura estable, higrómetro preciso, ovoscopio, fuente de calor para criadora, termómetro y ropa de cama segura.
- Características principales a priorizar: termostato digital, flujo de aire constante, construcción fácil de limpiar, ventana de visualización transparente, giro automático y cuidado posterior robusto (calor de la criadora e hidratación).
- Qué evitar: Plásticos baratos que se deforman, temperaturas inconsistentes, corrientes de aire y hacinamiento.
- Adaptaciones por edad: Rutinas de observación y cuidado de K-2; Seguimiento de datos de los grados 3.º a 5.º; Variables experimentales de los grados 6.º a 8.º; Investigaciones alineadas con los NGSS de la escuela secundaria.
- Alineación NGSS: LS1.A/B, LS3.A/B; SEP: Planificación y ejecución de investigaciones; Análisis e interpretación de datos; Participación en argumentos a partir de la evidencia.
- Cronograma estacional: comience en los meses más fríos para climas cálidos; planifique las eclosiones de verano solo con mitigación de calor activa.
- Solución de problemas: calibrar los termómetros, controlar la humedad según el rango diario e implementar un protocolo de “bloqueo” los días 18 al 21.
- Próximo paso: Lea los artículos sobre incubación y cuidado de pollitos de Az Chickens: Cría e incubación , Consejos para incubar huevos Consejos para el cuidado de los polluelos .
Utilice el siguiente plan como una secuencia lista para enseñar. Puede comprimir o ampliar cada fase para adaptarla a su calendario, manteniendo intactos los objetivos de aprendizaje.
Descripción general del plan de estudios: 4 a 6 semanas con objetivos NGSS
La base de un buen kit es un plan semanal claro con objetivos claros. A continuación, se presenta una secuencia flexible de 4 a 6 semanas que puedes ajustar o ampliar según tu calendario y el ritmo de tus alumnos.
Semana 0-1: Preparación y prelaboratorio
- Definir objetivos y reglas de seguridad; crear un “contrato de cuidado” de clase.
- Ensamble y pruebe la incubadora durante 48 horas: verifique que la temperatura sea estable a 99,5 °F (aire forzado) o 101,5 °F (aire quieto) y que la humedad sea estable dentro del rango objetivo.
- NGSS: LS1.A/B—Estructura y función; Crecimiento y desarrollo de organismos.
- Intercurricular: escritura narrativa: "¿Qué creo que sucederá?"; arte: dibujar diagramas de incubadoras etiquetados con flechas de flujo de aire (énfasis en materiales de calidad: por qué son importantes los mejores sellos y juntas).
Semana 1: Llegada de los huevos y ovoscopia 101
- Desempaque los huevos para incubar; déjelos reposar con la punta hacia abajo de 12 a 24 horas a temperatura ambiente. No los lave; manipúlelos con las manos limpias y secas.
- Práctica de ovoscopia con un huevo de “prueba” no fértil para aprender la orientación de las celdas de aire (ver Consejos para incubar huevos ).
- Matemáticas: registrar el peso inicial para el seguimiento de la humedad; calcular los objetivos de porcentaje de pérdida de peso.
- NGSS: SEP—Planificación y ejecución de investigaciones; análisis e interpretación de datos.
Semana 2: Días 1 a 7 de incubación
- Controles diarios: registro de temperatura, registro de humedad, girar los huevos 3 a 5 veces al día, a menos que se utilice un volteador automático.
- Día 7 de la vela: identificar las vetas y descartar las transparentes para proteger el resto.
- Cuaderno de ciencias: gráfico de la línea de tiempo del inicio del desarrollo del embrión.
Semana 3: Días 8 a 14 de crecimiento
- Refine la humedad según los objetivos del rango diurno; ajuste la ventilación para una evaporación constante.
- Día 14 de la vela: confirmar movimiento, crecimiento de células de aire; observar anormalidades.
- Escritura: reflexión a mitad del proyecto; arte: observación de siluetas (observe la “artesanía de calidad” en la estructura y función de la cáscara de huevo).
Semana 4: Días 15 a 18 antes del confinamiento
- Deje de voltear los huevos el día 18; aumente la humedad para la eclosión (“bloqueo”).
- Set criadora: fuente de calor, termómetro, bebederos, cama antideslizante.
- NGSS: Causa y efecto: cómo la humedad influye en la flexibilidad de la membrana.
Semana 5: Eclosión (días 20 y 21)
- Observe las fases de pip interno, pip externo y cremallera: no se abre durante el cierre.
- Registrar los tiempos de eclosión; comparar con las expectativas de la raza; graficar los resultados.
- Ética y cuidado: transferir a la criadora cuando esté esponjada y activa.
Semana 6: Lanzamiento de la criadora y reflexión
- Controles diarios de la criadora: gradiente de temperatura, hidratación, consumo de alimento, postura.
- Evaluación sumativa: informes de laboratorio, presentaciones orales o diarios fotográficos.
- Extensión: investigación de razas; guión gráfico del ciclo de vida de huevo a huevo.
Mapeo NGSS (de un vistazo)
- LS1.A/B, LS3.A/B; SEP: Investigaciones, Análisis de datos, Argumentación basada en evidencia.
- CCC: Causa y efecto; Sistemas y modelos de sistemas; Estructura y función.
A medida que avanza en la línea de tiempo, concéntrese en las condiciones constantes y la observación cuidadosa: esos hábitos generan tasas de eclosión más altas y resultados de aprendizaje más sólidos.
Adaptaciones específicas según la edad
- K–2: horarios con imágenes, indicaciones de observación simples (“¿Qué cambió hoy?”), contar crías, dibujar contornos para velas, tareas de cuidado como quehaceres.
- Grados 3.º a 5.º: registros diarios, gráficos de temperatura y humedad, vocabulario (pip, zip, air cell), carta a un amigo explicando el proceso.
- Grados 6 a 8: Preguntas evaluables (por ejemplo, impactos del rango de humedad), variables controladas, mediciones replicadas, análisis de errores; escritura argumentativa con evidencia.
- Escuela secundaria: Diseñar y llevar a cabo una investigación controlada (por ejemplo, efecto de la frecuencia de giro en los resultados), analizar la varianza, citar literatura primaria, ética en la legislación sobre el cuidado animal.
Adapte los objetivos en lugar de reducir las expectativas: los estudiantes de todos los niveles pueden contribuir de manera significativa a la atención, los datos y la reflexión.
Lista de verificación completa de suministros
Usa esta lista para armar tu equipo. Para obtener consejos técnicos y específicos para cada clima, consulta: Cría e incubación , Consejos para incubar huevos y Consejos para el cuidado de los polluelos .
Incubación
- Incubadora con termostato confiable (se recomienda aire forzado): busque sellos herméticos, una ventana de visualización transparente e interiores fáciles de limpiar.
- Volteador de huevos (programado manualmente o volteador automático): el volteo constante evita la adhesión de embriones y reduce los errores de manipulación.
- Termómetro e higrómetro digitales precisos: verifique con un segundo instrumento y calibre antes de colocar los huevos.
- Lámpara de vela (preferiblemente LED) y un “huevo de prueba” para practicar: una luz más brillante y un haz angosto mejoran la visibilidad de las vetas y las celdas de aire.
- Agua destilada para controlar la humedad: minimiza la acumulación de minerales en canales y mechas.
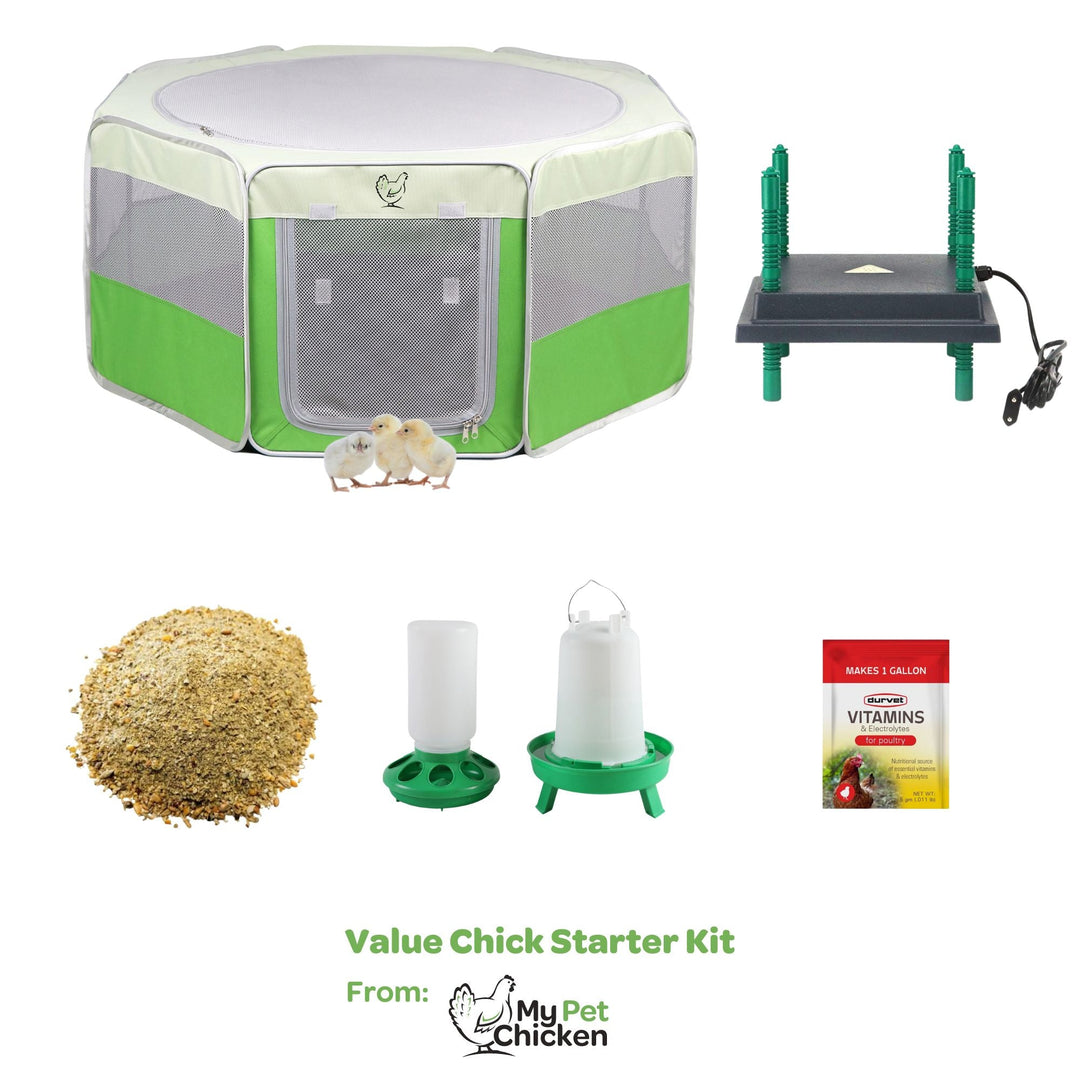
Criadora y cuidado
- Criadora sin corrientes de aire con lados seguros: las paredes transparentes facilitan la observación y al mismo tiempo protegen a los polluelos de las mascotas y sus hermanos.
- Fuente de calor (ajustable), más termómetro a nivel de los pollitos: las placas radiantes o los emisores de cerámica crean un calor constante y silencioso.
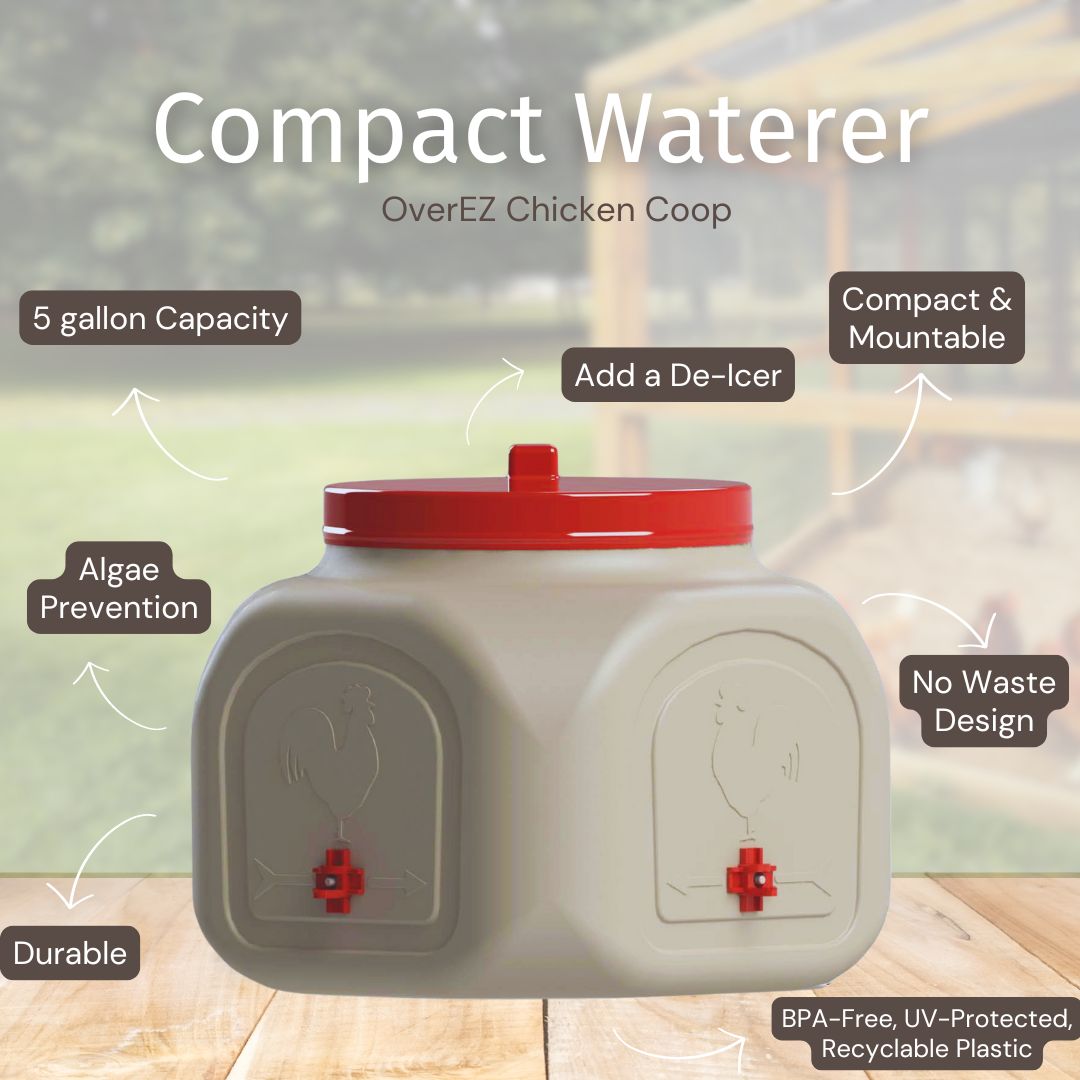
- Bebedero poco profundo con canicas o piedras para mayor seguridad: evita ahogamientos accidentales durante la primera semana.
- Alimento inicial y ropa de cama antideslizante: las toallas de papel durante las primeras 48 horas sobre la ropa de cama ayudan a los polluelos a encontrar el alimento y estabilizar el equilibrio.
- Kit de limpieza: toallas de papel, desinfectante seguro para áreas de aves de corral; limpie entre grupos para reducir el riesgo de patógenos.
Mantenimiento de registros y evaluación
- Hojas de registro diario (temperatura, humedad, volteo, notas).
- Páginas de bocetos de vela (día 7 y día 14).
- Registro de eclosión y lista de verificación posterior a la eclosión.
- Rúbricas para presentaciones e informes de laboratorio.
- Plantilla de diario fotográfico o portafolio digital.
Intente utilizar componentes que pueda reutilizar a lo largo de los años; los mejores kits son duraderos, fáciles de desinfectar y sencillos de utilizar para los alumnos con supervisión.
Desglose del presupuesto y opciones de valor
No es necesario gastar de más para lograr resultados excelentes. Como un traje de lujo bien confeccionado, lo importante es el ajuste y el acabado: temperatura constante, flujo de aire limpio y materiales de calidad que resistan la limpieza y el uso repetido.
- $75–$125 Bricolaje básico: Incubadora pequeña con giro manual, termómetro/higrómetro independiente, vela con una linterna brillante, criadora portátil sencilla y fuente de calor segura.
- $150–$225 Nivel medio: Incubadora de aire forzado con mejores sellos, ventana de visualización, controles más precisos y un volteador automático para reducir errores de manipulación.
- Premium de $250 a $300+: mayor capacidad, control digital sumamente estable, superficies fáciles de limpiar y mejoras que brillan en climas cálidos (ventilación y estabilidad de la humedad).
Considere el costo total de propiedad: la precisión y la durabilidad se pagan por sí solas con tasas de eclosión más altas, menos pérdidas y una limpieza más fácil entre cohortes.
Consideraciones sobre el clima cálido
En el suroeste o regiones similares, el calor ambiental puede hacer que las incubadoras superen las temperaturas objetivo y resequen los huevos. Planifique el proyecto para los meses más fríos y utilice las recomendaciones climáticas específicas de Cría e incubación en climas cálidos y Prácticas sostenibles en climas cálidos .
- Estabilice su sala de incubación: evite el sol directo, use un ventilador para ventilar la habitación (no sobre la incubadora) y controle las temperaturas mínimas durante la noche.
- La humedad tiende a disminuir rápidamente: llene los canales con agua destilada y utilice instrumentos calibrados; aumente la superficie con esponjas limpias si es necesario.
- Para empezar el verano, trate esto como seleccionar una artesanía: opte por una calidad de construcción que resista la deformación y selle bien contra las corrientes de aire.
Guía de solución de problemas
- Desviación de temperatura: Confirme con dos instrumentos; aleje la incubadora de las rejillas de ventilación y ventanas; deje un período de estabilización de 24 a 48 horas.
- Baja tasa de eclosión: revise el manejo de los huevos (descanso al llegar), el cronograma de giro, el rango de humedad por día y la disciplina de confinamiento (no abrir mientras se cierra la cremallera).
- Polluelos pegajosos: generalmente, humedad demasiado baja al nacer; aumente la humedad al cerrar el nido y evite abrirlo con frecuencia.
- Corte de energía: mantenga la incubadora cerrada para conservar el calor; una vez que sea seguro, vuelva a estabilícela y documente la duración para interpretar los resultados.
- Piernas abiertas/deslizamientos en la criadora: utilice ropa de cama antideslizante y asegúrese de que haya un gradiente de calor adecuado; consulte Consejos para el cuidado de los polluelos .
- Preocupaciones de salud: revise los riesgos locales como el de Marek en Arizona: Enfermedad de Marek: Pollos en Arizona .
Integraciones entre materias
- Matemáticas: Graficar la temperatura y humedad diarias; calcular el porcentaje de pérdida de peso del huevo y correlacionarlo con el éxito de la eclosión.
- Escritura: diarios de observación, informes de laboratorio, ensayos persuasivos sobre la ética del cuidado animal.
- Arte: Dibujos de siluetas al trasluz; diagramas etiquetados del desarrollo del embrión y disposición de la criadora.
- Estudios bíblicos (opcional): Temas de creación, mayordomía y responsabilidades de cuidado; diario reflexivo sobre el asombro y la responsabilidad.
Herramientas de evaluación
- Rúbrica del registro diario: integridad, precisión y reflexión.
- Rúbrica del informe de laboratorio: Claridad de la pregunta/hipótesis, integridad de los datos, análisis y conclusión basada en evidencia.
- Presentación oral: elementos visuales, vocabulario científico, explicación de datos y preguntas y respuestas.
- Control de cuidados prácticos: manejo seguro, controles de criadoras y rutinas de saneamiento.
Comparación entre kit completo y kit DIY
| Opción | Ventajas | Contras | Mejor para |
|---|---|---|---|
| Construcción de bricolaje | Menor costo; personalice cada componente; los estudiantes aprenden sobre abastecimiento y evaluación. | Es hora de investigar y calibrar; riesgo de desajuste; curva de aprendizaje más pronunciada. | Familias que disfrutan haciendo experimentos y quieren enfatizar el diseño de ingeniería. |
| Kit curricular completo | Llave en mano; componentes combinados; control de calidad más estricto; puesta en marcha más rápida; materiales alineados. | Mayor costo inicial; menor personalización. | Padres ocupados, cooperativas y pollitos primerizos que buscan confiabilidad y estructura. |
Guía de tiempos estacionales
- Climas cálidos: Para mantener la temperatura ambiente estable, comience a finales de otoño o principios de primavera. En verano, planifique refrigeración adicional y controle la humedad.
- Regiones húmedas: deshumidifique la habitación si la incubadora funciona demasiado húmeda; controle la pérdida de peso de los huevos y ajuste la ventilación.
- Climas fríos: Evite colocar la incubadora cerca de paredes exteriores; caliente previamente el espacio de la habitación y elimine las corrientes de aire.
Consejos de enseñanza para padres y preguntas frecuentes
- ¿Cuántos huevos? Empiece con una capacidad que se ajuste a su plan de criadora. El hacinamiento reduce el bienestar y la calidad del aprendizaje.
- Saneamiento: Lávese las manos antes y después de manipular; desinfecte las superficies; nunca rocíe los huevos directamente.
- Frecuencia de observación: Observaciones cortas, diarias y de alta calidad, en lugar de la apertura constante. Enseñe moderación durante el confinamiento.
- ¿Qué pasa si un pollito se retrasa? Tenga paciencia; algunos nacen el día 22. Intervenga solo si hay indicios claros de sufrimiento y después de revisar las mejores prácticas.
- Conceptos básicos de bioseguridad: mantenga el calzado exterior y las mascotas lejos del área de cría; limpie el equipo entre grupos para reducir el riesgo de enfermedades.
- Plan de cuidados posteriores: decida de antemano si los polluelos se unirán a su bandada o serán reubicados de manera responsable una vez que tengan plumas.
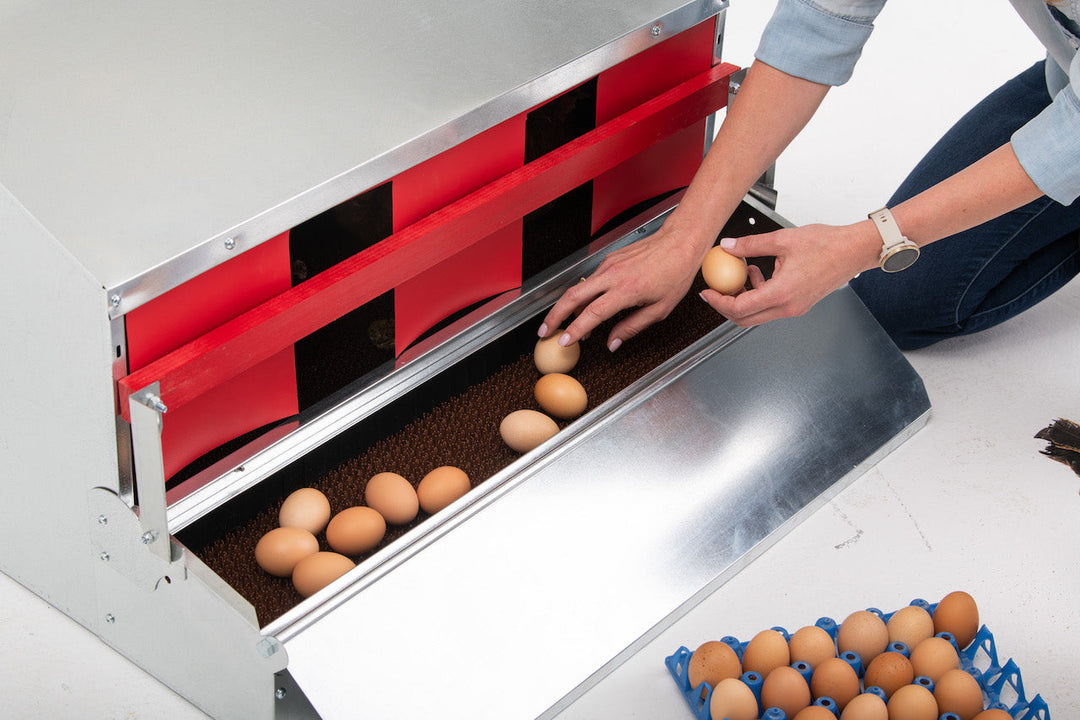
Referencia visual: equipos y configuraciones
A continuación se muestran imágenes generales del equipo de recursos de Az Chickens. Para obtener orientación técnica, consulte: Consejos para incubar huevos y Cuidado de polluelos .

Cómo elegir componentes de calidad (qué buscar)
- Ingeniería de incubadoras: Flujo de aire constante (aire forzado), sellos herméticos y un termostato confiable. Las ventanas transparentes permiten el aprendizaje sin necesidad de abrirlas; las carcasas de plástico o metal, resistentes a la deformación por el calor y la limpieza.
- Control de humedad: Canales fáciles de llenar desde el exterior; higrómetro preciso; ventilación que evita corrientes de aire directamente sobre los huevos. Una superficie de agua más amplia ayuda a regular la humedad sin excederse.
- Volteo de huevos: Los volteadores automáticos reducen la manipulación y mantienen horarios consistentes, lo que resulta especialmente útil con alumnos de diferentes edades. Los volteadores manuales requieren rutina, pero desarrollan sólidas habilidades procedimentales.
- Construcción de la criadora: Recinto sin corrientes de aire, calefacción regulable y superficies antideslizantes para evitar lesiones en las patas. Elija materiales que se desinfecten fácilmente y no se degraden con el uso repetido.
Recursos y rúbricas imprimibles (DIY)
- Registro diario de incubación (temperatura, humedad, volteo, notas).
- Hojas de trabajo de velación (día 7 y 14) con siluetas etiquetadas.
- Hoja de observación del día de eclosión (pip, zip, hora de eclosión).
- Lista de verificación para el cuidado de la criadora (controles AM/PM, calor, agua, alimento, ropa de cama).
- Rúbricas de evaluación para registros, informes de laboratorio y presentaciones.
Actividades de extensión
- Análisis profundo de los datos: comparar las tasas de eclosión con planes de humedad ligeramente diferentes; mostrar los resultados como diagramas de caja y bigotes (grados 6+).
- Investigación de razas: Explore las razas y características tolerantes al calor utilizando Razas de pollos resistentes al calor 2025 .
- Ética y bienestar: Debatir los estándares de atención y las prácticas de administración; citar evidencia y pautas locales.
- Desafío de diseño: crear una criadora a prueba de corrientes de aire con un gradiente de calor uniforme, luego probarla y repetirla.
Dónde aprender más sobre los pollos de Arizona
Construya su plan con instrucciones detalladas y conocimientos específicos sobre el clima:
- Consejos para incubar huevos : mejores prácticas de preparación, manipulación y ovoscopia.
- Consejos para el cuidado de los polluelos : instalación de la criadora, hidratación y nutrición temprana.
- Cría e incubación : adaptaciones y planificación para climas cálidos.
- Prácticas sostenibles en climas cálidos : mitigación del calor y bienestar.
- Guía de inicio para principiantes : una introducción útil si este es su primer rebaño.
Lista de verificación final antes de comenzar
- La incubadora ha funcionado de manera estable durante 48 horas; termómetro/higrómetro de respaldo verificado.
- Los huevos reposaron de 12 a 24 horas con la punta hacia abajo; práctica de ovoscopia completa.
- Hojas de registro diarias impresas; estudiantes preparados en roles y seguridad.
- Criadora ensamblada con fuente de calor, bebedero, alimento y cama antideslizante.
- Se han planificado adaptaciones para climas cálidos (refrigeración de habitaciones, suministro de agua, cronograma de monitoreo).
- Plan básico en caso de corte de energía (mantener la tapa cerrada; volver a estabilizarla antes de abrirla).
¿Por qué incorporar calidad desde el primer día?
Los estudiantes aprenden más cuando el equipo es confiable y las ventanas de observación permanecen cerradas durante los períodos críticos. Ese es el enfoque personalizado: buen ajuste y acabado, elegido una vez, usado durante años. Priorizar componentes bien diseñados y materiales de calidad reducirá la frustración, protegerá el bienestar animal y elevará la ciencia.
Nota: Esta guía se centra en procesos fiables y resultados de aprendizaje. Para conocer técnicas específicas y ajustes climáticamente inteligentes, visite: Cuidado de pollitos , Cría e incubación , y Prácticas sostenibles en climas cálidos en Az Chickens.


