

Buy Complete Quail Starter Kit for Balcony Breeding: The Ultimate Urban Buyer’s Guide
Balcony quail breeding is the city homesteader’s “tailored suit”: compact, quiet, and refined when done with quality materials and good design. This guide walks you through selecting a complete quail starter kit for apartment or condo balconies—organized by budget tiers and focused on craftsmanship, sanitation, and HOA-friendly operation. You’ll find practical layouts, calculators for space and weight, and decision frameworks for Starter, Producer, and Breeder setups—all supported by Az Chickens’ education hub for quail owners and their coverage of cages, brooders, and southern climate housing. Use it as a blueprint to go from testing the waters to a polished, reliable setup that fits your space and lifestyle.
Key Takeaways / Summary
- Budget tiers:
- Starter Kit ($150–$200): Test quail keeping with a pair and a basic, sanitary housing/brooder combo.
- Producer Kit ($250–$350): Breeding trio in a larger, easy-clean cage; basic incubation support if you plan to hatch occasionally.
- Breeder Kit ($400–$500): Multi-tier housing for multiple pairs, plus a full incubation workflow and accessories for consistent production.
- Core components for balconies: compact quail-specific cages and brooders are supported at Az Chickens (see their Health and nutrition hub and Quail basics for first-time owners).
- Space efficiency: Multi-layer, plastic quail systems (e.g., a three-layer unit pictured on Az Chickens) maximize vertical space and simplify cleaning—ideal for balconies.
- What to look for:
- Craftsmanship: Smooth-molded plastic, rounded edges, quality wire mesh, and easy-access trays reflect “Italian suit” attention to detail and last longer on balconies.
- Sanitation: Sloped floors for egg roll-out, removable droppings trays, and plastic components that tolerate frequent washdowns.
- Ventilation and heat resilience: Southern-climate-informed housing and water systems; shade and airflow matter for urban balconies.
- Education support: A beginner hub and incubation guidance reduce mistakes and speed up ROI.
- Regulatory fit: Noise is low compared to chickens; focus on HOA rules, setbacks, and neighbor-friendly odor control.
- Production plan: Pair your kit with the right feed, brooder temperature, and incubation routine to reach stable egg output without crowding.
- Quick specs to remember:
- Stocking guide: about 0.5–1.0 sq ft per adult Coturnix quail; height kept modest to reduce “boinking.”
- Breeding ratio: 1 male to 3–5 females for good fertility and calmer birds.
- Heat thresholds: >95°F demands shade, airflow, and cool water; move brooders/incubators indoors.
Why balcony quail—think luxury suits, Italian craftsmanship, and quality materials
When you’re working with a small space, the details matter like a luxury suit: fit, seams, and fabric tell you whether the piece will hold up. Quail systems echo this thinking. A well-built plastic cage with precision-molded tiers, smooth egg roll-out, and removable droppings trays is like a garment cut by a master—everything aligns, nothing snags, and you get a clean silhouette on your balcony. Az Chickens’ content for new quail owners highlights compact, quail-specific housing and brooders, and you’ll see multi-layer plastic systems pictured that serve 15 birds while using very little footprint—exactly the “tailored” approach an HOA can live with. Low headroom cages help prevent head injuries from startled jumps, and rounded edges plus rigid plastics tolerate frequent cleanings without warping.

Example of a multi-layer plastic quail breeding system pictured on Az Chickens—compact, easy-clean, and balcony-friendly.
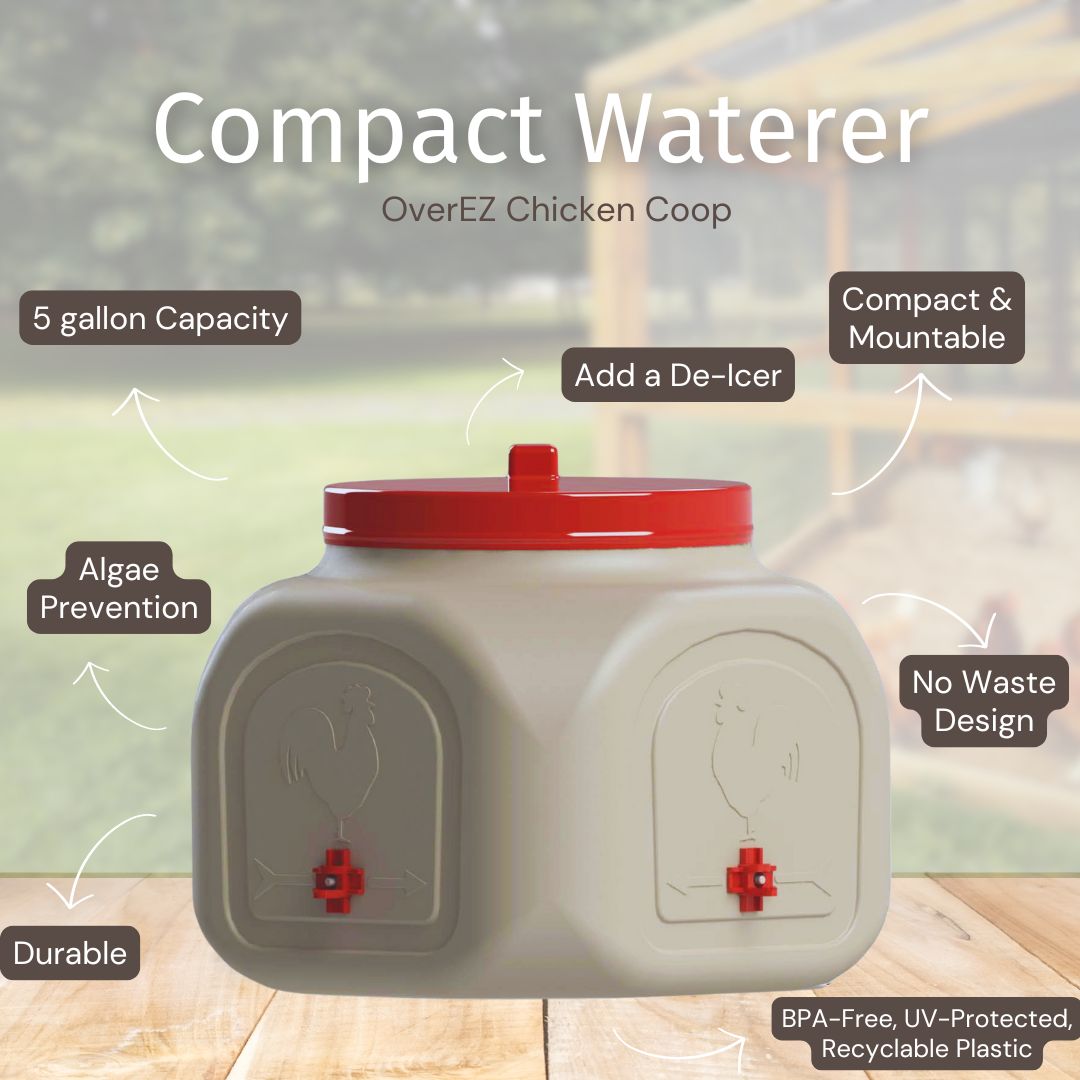
Compact waterer example shown on Az Chickens—balanced hydration is essential in hot balcony conditions.
Start here: The balcony breeder’s blueprint
Before buying equipment, sketch your balcony dimensions, note sun exposure, and list building rules. The goal is a system that’s sanitary, neighbor-friendly, and heat-resilient. Confirm where power outlets are (GFCI if outdoors), how you’ll route cords safely, and how you’ll manage drainage and tray rinsing without splashing neighbors. Az Chickens’ Balcony housing and ventilation in hot climates article gives you the climate lens; their Quail basics for first-time owners hub covers the daily care through to breeder-level planning; and Breeding and incubation essentials helps you decide how far you want to go with hatching vs. buying chicks. Refer to the calculators below as you finalize your footprint and load plan.
Three kit tiers—choose your “fit” and finish
Pick a tier below based on your goals and HOA constraints, then match housing and brooder sizes to the actual balcony footprint. Think of each tier as a garment level—Starter is off-the-rack, Producer is tailored, and Breeder is “Italian atelier” quality with room to scale. If in doubt, start smaller and invest in higher-quality materials; you can add tiers later without replacing everything.
1) Starter Kit ($150–$200): Try quail on a small balcony with essentials
- Ideal for: One pair of quail, or a tiny group for eggs only.
- Housing: A single compact cage that’s easy to hose off, with a removable droppings tray. Plastic components are preferable for sanitation and weather-resistance. Look for UV-stabilized plastics and smooth, rolled wire to protect feet.
- Brooder: Simple, safe brooder for chicks with a reliable heat source and a non-slip floor. Radiant heat plates reduce fire risk and drafts; heat lamps require extra caution and secure mounting. Pair this with the Chick care checklist.
- Feed and water: Balanced feed for Coturnix/Celadon (see Coturnix and Celadon quail nutrition guide) and a spill-minimizing waterer suitable for warm weather.
- Expected output: A few eggs per week; think proof-of-concept and skills-building rather than peak production.
- Why it works on balconies: Minimal footprint, low weight, quick cleanups, and tight odor control.
2) Producer Kit ($250–$350): Breeding trio, consistent eggs, and incubation basics
- Ideal for: A trio for regular egg production and occasional hatching.
- Housing: Slightly larger cage or two-tier setup, keeping males separated as needed for peace and fertility management. Smooth egg roll-out helps collection and cleanliness; provide 1:3–1:5 male-to-female ratio for fertility without overbreeding.
- Incubation basics: Pair your setup with the planning in Breeding and incubation essentials. Keep the workflow simple at first—thermometer/hygrometer, candling, and a hatch calendar.
- Climate-proofing: Fans or evaporative strategies and shade based on Southern Climate Housing Solutions. Keep waterers shaded to reduce algae and heat gain.
- Why it works on balconies: Efficient vertical stacking, sanitary design, and the capacity to grow without overwhelming space or neighbors.
3) Breeder Kit ($400–$500): Multi-tier, multiple pairs, and full incubation
- Ideal for: Multiple breeding pairs and a steady hatch cycle—small commercial or self-sufficiency goals.
- Housing: A multi-layer plastic system, like the three-layer layout pictured on Az Chickens, that can hold a larger breeding cohort with excellent cleanability. Ensure lockable casters for stability and easy tray access.
- Full incubation stack: From storage to hatch day, use Hatching egg tips and Breeding & incubation guidance to set schedules, backups, and troubleshooting protocols.
- Operational rhythm: Staggered hatches, a brooder “bank” for different ages, and a weekly sanitation cadence to keep HOA-friendly standards.
- Why it works on balconies: The right multi-tier system delivers capacity without sprawl, maintaining HOA compliance and neighbor goodwill.
Craftsmanship and materials: What actually lasts on a balcony
Balconies magnify poor design. Humidity swings, dust, and sun will quickly expose flimsy metal and thin plastics. Look for the “Italian craftsmanship” equivalent in poultry gear: tight tolerances, rounded edges, easy-rolling trays, and materials that tolerate frequent washing. From Az Chickens’ content, plastic quail cage systems are clearly emphasized for ease of cleaning and balcony sanitation. The three-tier, plastic design pictured in their educational material is a strong indicator of the category’s value for urban keepers.
- Plastic tiers and trays: UV-stabilized plastics resist corrosion, handle spray-cleaning, and shed waste easily.
- Quality mesh: Smooth, sturdy wire (appropriate gauge) prevents foot injuries and allows droppings to fall through.
- Removable droppings trays: Essential for odor management and fast, neighbor-friendly cleanups; a small lip reduces slosh.
- Egg roll-out floors: Reduce cracked eggs and keep food and feces separated. A gentle slope improves collection.
- Ventilation-first brooder: Balanced heat and airflow reduces ammonia and heat stress; prefer enclosed sides with screened vents for draft control.
- Hardware details: Stainless or coated fasteners, lockable wheels, and snug-fitting doors with secure latches deter pests and escapes.
Balcony compliance: Quiet, tidy, and invisible to neighbors
Quail are significantly quieter than chickens, especially roosters, and that’s your first HOA win. The rest is cleanliness and discretion. A compact, well-built system with tidy trays and shaded ventilation keeps odor and flies down while showing neighbors you respect the shared space. Also check your lease and local ordinances in addition to HOA rules; align your cleaning and waste disposal plan with building policies.
HOA checklist
- Confirm “poultry” allowances and species rules; ask if quail are considered different from chickens.
- Check setback requirements from property edges and adjacent units.
- Confirm limits on cage visibility—use privacy screens if required.
- Document your sanitation plan: droppings-tray frequency, bedding management, and trash handling.
- Clarify noise policies; emphasize that quail are quiet compared to roosters.
- Check for heat-mitigation warnings during high-temperature periods.
- Insurance and liability: verify if your renter/HOA insurance has restrictions on animals on balconies.
Space and weight calculator
Start with your actual balcony size and the cage system you plan to use. Then stress-test weight and space assumptions before you buy. Aim to distribute weight over multiple contact points (rubber feet or pavers) and keep the footprint against a load-bearing wall. Water is heavy—include full waterers in your total weight estimate.
Rule of thumb: keep total system weight well below the posted limit, and avoid point loads on thin decking. If unsure, ask building management about allowable balcony loads for shelving or planters—your cage is similar in weight and concentration.
ROI planner: Eggs, feed, and a realistic break-even
Your return depends on egg output, feed costs, and your market. The education hubs at Az Chickens guide nutrition and breeding choices (nutrition guide and incubation essentials). Use the simple calculator below to sketch your scenario. If you’re not selling eggs, plug in your grocery price equivalent to estimate “savings” instead. Check local rules before selling eggs directly.
Production notes: Coturnix hens can lay most days with proper protein and calcium. Expect a ramp-up after 6–8 weeks of age. Heat stress and low light reduce output; see the nutrition guide for feed targets that support consistent laying.
Balcony layout examples (3×8 ft and 4×10 ft)
Visualize your quail “atelier” like a fitted wardrobe. Pick a central housing unit, then plan clear walk space and airflow. Two common footprints:
- 3×8 ft balcony:
- Place a compact two-tier quail cage along the 8 ft wall, leaving at least 24 in walkway.
- Brooder sits under shade with cross-ventilation; waterer on the shaded side; droppings tray access facing inward.
- Add a small mat or boot tray under the unit to catch drips during cleanouts.
- 4×10 ft balcony:
- Run a three-tier cage against the 10 ft wall; allow 24–30 in aisle space.
- Incubation station (if applicable) inside the apartment to stabilize temperature; use the balcony for brooder/housing only.
- Orient for prevailing breeze and shade; avoid direct late-afternoon sun on the cage front.
Use Az Chickens’ Southern Climate Housing Solutions to design airflow, shade angles, and water placement—these small adjustments pay off massively in summer.
Starter, Producer, Breeder: Component checklists
Here’s what separates the tiers. When products are in stock, Az Chickens’ education content indicates they support quail-specific cages and brooders; use these lists to confirm you’re getting a complete kit:
Starter Kit checklist
- Compact, quail-specific cage with droppings tray and egg roll-out floor.
- Basic brooder with safe heat source and non-slip floor.
- Quail feed per the nutrition guide.
- Small, spill-resistant waterer suited to heat management.
- Simple cleaning kit: scraper, brush, mild detergent safe for plastic and wire.
- Storage: sealable bin for feed; keep off the floor and pest-proof.
Producer Kit checklist
- Larger or two-tier quail cage; consider separate bachelor space for males.
- Brooder with better heat control and airflow.
- Incubation basics: temp/humidity monitoring and a hatch schedule (see incubation essentials).
- Feeders that minimize waste; waterers that resist algae and heat stress.
- Shade cloth or reflective screen for west-facing balconies.
- Backup power plan for incubator (portable battery/UPS) if outages are common.
Breeder Kit checklist
- Multi-tier plastic quail housing, as pictured on Az Chickens’ education pages.
- Full incubation workflow (storage, incubation, lockdown, and hatch).
- Brooder bank for staggered batches.
- Sanitation upgrades: spare trays, quick-release components for frequent washing.
- Record-keeping: breeding logs, hatch rates, and feed use tracking.
- Biosecurity: dedicated shoes/gloves and a handwashing routine to prevent cross-contamination.
Noise, odor, and neighbor-proofing
- Noise: Quail are far quieter than chickens—especially roosters. Keep males separated if needed; rely on sound-absorbing furnishings and balcony privacy screens.
- Odor: Use sloped floors and frequent tray cleanouts; rinse trays and sun-dry plastic components for odor reduction. Balance feed to avoid wet waste (see Health and nutrition hub).
- Flies: Keep waterers tidy and eliminate spills; scrub trays regularly. A light sprinkle of zeolite or PDZ in trays can help bind ammonia.
- Visibility: Match cage profiles to balcony lines—vertical units preserve a low-profile look.
- Waste handling: Double-bag droppings and store away from sun until trash day; never hose waste off the balcony.
Southern climate: Heat plays by its own rules
If you’re in the hot Southwest, treat heat management as non-negotiable. Az Chickens’ Southern Climate Housing Solutions outlines seasonal strategies. Keep brooders and incubators indoors where temperatures are stable; leave only housing outside.
- Shade first, breeze second: Place cages in shade and oriented for cross-ventilation.
- Hydration upgrades: Keep waterers out of direct sun. Refresh more frequently on high-heat days.
- Plastic advantage: Plastic tiers clean fast, resist corrosion, and won’t hold heat like metal plates.
- Hot-day routines: Freeze water bottles for temporary cooling near (not in) brooders; clean trays earlier in the morning.
- Baseline targets: Incubators typically run near 99.5°F (forced air) with moderate humidity, increasing at lockdown; brooders start warm and reduce ~5°F per week. Cross-check specifics in incubation essentials and chick care.
Education reduces mistakes (and cost)
Az Chickens maintains an education hub for beginners, plus topic pages that support each step of a balcony breeder’s setup and growth:
- Quail basics for first-time owners: Onboarding, daily care, and category overviews.
- Balcony housing and ventilation in hot climates: Layout and seasonal care.
- Breeding and incubation essentials: Set your calendar and troubleshoot.
- Coturnix and Celadon quail nutrition guide: Feed planning for consistent production.
- Chick care checklist: Brooder setup and early-care troubleshooting.
- Hatching egg tips: Incubation best practices and fixes.
- Health and nutrition hub: Supplemental supplies and routine care.
Troubleshooting common urban challenges
- Heat spikes: Move brooder or incubator inside; only housing stays on balcony with shade and airflow. Monitor hydration closely and pause hatching during extreme heat.
- Odor surges: Increase tray cleanouts; rinse and sun-dry plastic parts to suppress odor; review feed to ensure it’s not causing wet waste.
- Predators: Secure doors and use sturdy latches; keep cages off the railing with a solid anchor; avoid food on floors.
- Neighbor concerns: Offer a quick walkthrough of your sanitation routine and show the low-noise profile; reassure with a visible cleaning schedule.
- Incubation setbacks: Cross-reference Hatching egg tips and confirm humidity/temp tracking; start small batches to dial in.
- Feed waste: Adjust feeder height and lip depth; consider crumble size to reduce billing (spillage).
Quality standards checklist—your “tailoring” inspection
- Edges and joins: Smooth, no burrs; trays slide easily and seat firmly.
- Plastic thickness: Rigid enough to resist flex; tolerates frequent washing.
- Wire gauge and spacing: Protects feet; keeps chicks safe; resists bending.
- Removability: Trays, feeders, and waterers detach and reattach quickly.
- Vent and shade options: Works with your balcony orientation and sun pattern.
- Slope and roll-out: Even slope avoids egg pileups; roll-out lip protects shells.
- Casters and locks: Wheels roll smoothly and lock securely to prevent movement during cleaning.
For visual planners: a compact “capsule” setup
In fashion, a capsule wardrobe covers every scenario with a handful of high-quality pieces. Your balcony kit should do the same:
- One multi-tier quail cage as the “jacket”—the core visual piece that sets cleanliness and capacity.
- A brooder as the “dress shirt”—stays inside or under shade with crisp temperature control.
- Feeders/waterers as the “shoes”—if they slip, the whole look collapses; pick stable, cleanable designs.
- Incubation stack as the “accessories”—you don’t need them to wear the outfit daily, but they elevate production when you’re ready.
- Finishing touches: a small tools caddy, odor binder for trays, and a labeled bin for feed and grit.
Getting started—step-by-step buying path
- Confirm your HOA and balcony specifics with the checklist above.
- Measure the balcony and run the space/weight calculator.
- Choose your tier (Starter, Producer, Breeder) and confirm the checklist items.
- Study the Quail basics for first-time owners to avoid day-one missteps.
- Mock-place cardboard templates of your cage footprint to test door swings and tray removal clearances.
- Set your odor control cadence; plan weekly tray changes and quick rinses.
- If hatching: align with Breeding and incubation essentials and Hatching egg tips.
- Day-1 routine: check fasteners, level the cage, shade the waterer, and observe birds twice on the first day—morning and evening.
Example gear in context (from Az Chickens’ educational pages)
These images, shown on Az Chickens’ site within educational content, illustrate the kind of compact, cleanable hardware that works well on balconies.
Three-layer quail system pictured on Az Chickens—an efficient balcony footprint with clean-out trays.
Compact waterer example—helps keep floors dry and birds hydrated in heat.
Season-by-season maintenance cadence
- Spring: Deep clean and inspect fasteners; confirm shade plan before the first heat wave.
- Summer: Clean trays more frequently; refresh waterers often; consider moving brooder/eggs indoors to stable temps.
- Fall: Review production targets; rotate breeders if needed; plan winter lighting if applicable.
- Winter (mild climates): Maintain airflow; avoid dampness; keep sanitation steady to prevent ammonia buildup.
- Any season: Descale nipples or cups on waterers periodically to maintain flow.
When to move up a tier
- You’re cleaning more than you’re collecting: move to a multi-tier with better trays/roll-out floors.
- Egg demand exceeds supply: add incubation capability and a brooder bank to stagger batches.
- HOA feedback is positive: invest in a system with better fit-and-finish to lock in neighbor goodwill.
- Care time exceeds 15–20 minutes/day: upgrade to waste-minimizing feeders/waterers and smoother tray systems.
Where to learn next (and plan your purchase)
Az Chickens concentrates the most relevant balcony-quail knowledge in a few places:
- Quail basics for first-time owners—daily care and housing considerations
- Balcony housing and ventilation in hot climates—layout and seasonal strategies
- Breeding and incubation essentials—decide if/when to hatch
- Coturnix and Celadon quail nutrition guide—feed to match production goals
- Health and nutrition hub—round out supplies with smart sanitation
Final word: Buy for the life you want on your balcony
A complete balcony quail kit should feel like a well-made suit—quietly confident, clean-lined, and built on quality materials. Start with the tier that matches your goals and HOA bandwidth, prioritize craftsmanship (smooth trays, sound plastics, good ventilation), and rely on Az Chickens’ education sections to move from Starter to Producer to Breeder without costly mistakes. With a compact, multi-layer setup, you’ll get the eggs you want and keep your neighbors—and your balcony—happy.


